Thursday, December 16, 2010

Ribbon Trees


A fun, easy holiday project - you can give as a gift or like me keep for yourself!
I don't recall where I saw the idea I think it was one of Michael's workshops or it could have been in a magazine anyway - I can't claim it as my craftiness!

 Materials:
ribbon
scissors
hot glue gun
cone shaped styrofoam or I found these cardboard ones at Michael's (less mess)

 cut ribbon in approx. 2" strips
fold over and put a little hot glue at one of the ends to hold the loop
put a dot of hot glue at the base of your cone and start attaching the ribbon loops and work your way up


Sunday, December 12, 2010

My Aunt Celia's Caramels

Every Christmas my Aunt Celia would make these homemade caramels so in honor of her I made them this year and to share with some of my very dear friends!

 Caramels
2 c. sugar
1 c. brown sugar
1 c. light corn syrup
1 c. milk
1 c. heavy whipping cream
1 c. butter or margarine
4 t. vanilla

Combine all the ingredients into a large sauce pan.  Cook slowly (low to medium heat), stir constantly (wooden or silicone spatula) until 248 degrees on a candy thermometer.  Pour into a buttered 9x13 glass dish.  Cool completely.  When firm turn onto board, cut into small squares and wrap individually in wax paper.

*Be prepared to stir for atleast 30-40 minutes*

DELICIOUS!!


Saturday, December 11, 2010

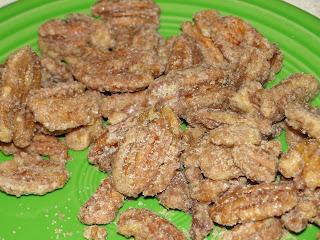
Sugared Pecans

Oh how I love to bake and cook and the weather and season are just right for being in the kitchen.  I hope to post more about what is coming out of my kitchen this holiday season.  What are your favorite sweet treats?

Sugared Pecans

For 2 lbs. Pecans
Combine 3 egg whites and 3 teaspoons of water...beat with mixer until frothy
Combine 2 cups sugar, 2 teaspoons cinnamon, and 1.5 teaspoons salt....stir until well blended.
Put pecans in egg white mix and stir until moist.
Put moist pecans in sugar mix and stir until well coated.
Spread on buttered shallow cookie sheets and bake for 60 minutes, stirring every 20 minutes until dry at 225 degrees. Remove from pan and let cool.

Saturday, December 4, 2010

Felt Christmas Pillow


I've had an extra throw pillow for about a year with no cover on it so I wanted to splash a little Christmas here and there and this is what I came up with.


Materials:
1 - 20x20" pillow
6 - 9x12" felt pieces (.25/each), cut into 2, 3 and 4 inch strips
1 - 30x30" piece of felt (used for the back - $2.99)
tread
sewing machine

Sewed the strips together to make to panels for the front - no real pattern just as long as they measure 24".  Sewed the two panels together, cut down the solid piece of felt for the back and sewed it so there was a raw edge and then snipped the edge to make the fray around it.  Pretty easy and I am happy with it.

Monday, November 15, 2010

The Turkey is a Funny Bird

 Noah and I have been working on some Thanksgiving crafts for our Thanksgiving table.  Everyone has seen the handprint turkey so really it is pretty much explains itself.  We mounted the cardstock on colorful construction paper to make placemats for our family and guests.  Quick and easy for little hands.

Tuesday, October 26, 2010

Paper Bag Pumpkins

Easy afternoon craft for kids.

Materials:
brown lunch sack
newspaper
orange paint
paint brush
green curling ribbon or green pipe stem cleaners

Optional:
black paint or black construction paper

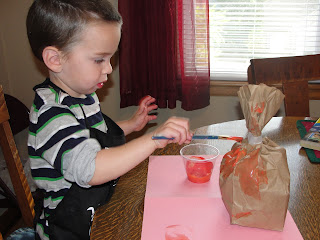
Have the kids ball up the newspaper and stuff the bag (1/2 to 3/4 full) tape up the top to make your pumpkin stem.  Let the kids paint.  When the paint dries tie your ribbon or wrap the pipe stem cleaner around the stem to make a vine.  Easy.  If you want to go a step further cut black shapes out of construction paper or what for the paint to dry and give the kids black paint to make their pumpkins into jack-o-lanterns. 

Friday, October 22, 2010

Halloween Costume: Firefighter

Materials:
Plastic Firefighter Hat (Dollar Tree)  $1
Black Shirt (Old Navy - and bought it two sizes larger than what Noah normally wear in case we need to layer up due to weather)  $6
Black Cargo Pant (Wal-Mart)  $7
Yellow Duck Tape (Wal-Mart)  $3.96
Reflective Silver Duck Tape (Wal-Mart)  $3.96
Iron-On American Flag Applique  (Wal-Mart)  I think it was $1.99
Iron On Yellow Letters (Micheals)  I think $4.99
Firefighter Rian Boots (not shown and borrowed from a friend, otherwise we were just going to use his snow boots)
Total Costume: approx. $30.00
 After some online searching of firefighter costumes, etc.  I decided on one stripe around the legs, two stripes around torso and 2 around the arms.  I had to remove one of the arm strips on one arm to fit the American flag applique onto the shoulder.  It was a fairly simple process.  All I had to do was cut the duck tape to the size of the garment and rap it around.  The silver duck tape I ripped in half the long ways to go down the center of the yellow.  One tip learned:
Do the iron ons BEFORE doing the duck tape on the arms because you have to turn the shirt inside out.


Tuesday, August 10, 2010

Pipe Stem Cleaners


So probably not a new thing to many of you but in the middle of the summer ideas are hard to think of when children are at your feet wanting something to do even though there is a play room, bedroom and let's face it every part of your house littered with toys.
Pipe stem cleaners, comes in tons of colors, and you can make just about anything with them.  Noah is sporting some fabulous bunny ears made by momma!  I also made him some glasses (just like mom and dad wear) but he didn't want to wear them.  Figures, I don't want to wear mine either.  So anyway: fun, easy, inexpensive.  Make a:
chain
string beads or cereal (great hand/eye, small motor dev. and the pipe cleaner stays in place unlike yarn or string for those little ones that are just getting the hang of it)
twist them together make bracelets and necklaces
let the creative juices flow

This is also a staple in our 'esturant bag.

Monday, August 2, 2010

Upside Down Berry Cornmeal Cake

This is super yummy and great with fresh basil and fruit!!

2 - 2 1/2 cups fresh berries (blueberries and red raspberries are our top choice)
1 1/3 cups flour
1/2 cup cornmeal
1 T. basil
2 t. baking powder
1/4 t. salt

Grease 8" round pan and arrange 1 1/2 cups berries. Combine these dry ingredients in a large bowl.

2 eggs, beaten
1/2 cup sugar
2/3 cup milk
1/3 cup oil

In a second bowl whisk these ingredients.  Add to flour mixture.
Pour mixture over berries.  Bake at 350 degrees for 40-45 minutes.  Cool.  Loosen sides, put serving plater on top of pan and flip.  Top with remaining berries and whipped topping!


It is a summer favorite in our house, enjoy! (Ignore the spot that didn't get berries)

Saturday, July 31, 2010

Applesauce

Another first for me.  David and I made applesauce last weekend and froze 4 - 32 oz. containers.  It is very yummy and very tasty.  It was super easy - mainly because my MIL has an grinder/peeler/applesauce maker (I am really not sure the technical term).  Apples are not in season just yet but we were given a half a box of red delicious apples that were leftover from a middle school church lock in.

We had about 30-40 apples (I kept forgetting to count) and froze 4 - 32 oz. containers.
First wash and quarter the apples (don't forget to remove any stickers, if you purchased them from the store)
Put about 2 inches of apple juice into your stock pot.
Put in quartered apples (if you have a grinder/peeler/whatnot you don't have to remove seeds or peel)
Cover and turn stove to hight until apples are very soft 20-30 minutes (stir occasionally to get the apples on the top to the bottom)
Once soft pour apples into the grinder and start cranking.

We did add a couple cinnamon sticks to our apple juice.
I am so excited about the yummy things that are filling up our freezer:

1 gallon bag of carrots
5 - 3 cup bags of sweet corn
1 gallon bag of green beans
7 - 2 cup bags of zuchinni
4 - 32 oz. of applesauce

Friday, July 23, 2010

Master Bedroom: Remodel

It really isn't that impressive but I (we) did it!  And I love it.  I still have some touches to do:  a couple pillows, pictures and/or shelving on the walls.  And eventually we will take care of the bigger projects: sconces, and closet.
Check out what it looked like before: Master Bedroom

Walls painted, curtains done, purchased bedskirt (it looks a little wrinkly, ignore that), purchased new bedside table, lamp and lamp shade for myself


Here is the curtain fabric up close, I am by far a top seamstress, but it will do and I am proud of my accomplishments.

My jewelery organizer and the curtains are the only thing on the walls right now.  I did end up repainted the frame of the jewelery organizer to black - the blue was just too much.  Like I said I hope to get pictures on the wall soon, I will probably share some more pictures.

Oh! and I am not a photographer by far and the lighting is pretty bad in these pics, sorry!

Thursday, July 22, 2010

The Header

I'm Working On It, YIKES!

Monday, July 12, 2010

Egg Rolls

1 pkg. (16 oz.) shredded coleslaw
1 cup cooked, diced meat (poultry or shrimp)
1 1/2 tsp. minced fresh ginger
2 garlic cloves, minced
1 tsp. pepper
1/2 tsp. salt
1 pkg. egg roll wrappers
Vegetable Oil

Stir together first 6 ingredients: slaw, meat, ginger, garlic, pepper, salt.
* WIDD (what I did differently) tossed the first 6 ingredients into a skillet with some soy sauce, until warmed and covered.*

Brush outer edge of egg roll wrapper with water *WIDD egg/water mixture.* Spoon a 1/3 cup of mixture into the center of the wrapper.  *Make sure filling has cooled before placing in the wrapper, it being hot seemed to tear the wrapper.*  Fold bottom corner over filling and tucking the corner under the filling, fold over left and right corners; gently press to seal.  Pour oil, depth of 3 inches (a lot of oil) into a dutch oven, heat until 375 degrees.  Fry egg rolls in batches of 3-4, until golden brown.  Serve immediantly.

These egg rolls were amazing!  I was so proud of us for trying something we have never made before.  I used chicken for our meat.  Also, if veggies are in season shredd your own slaw mix: cabbage, carrots.  This is also the first time I have ever used fresh ginger - now what to do with the rest....any ideas?  The wrapers is tear some but like I noted before I believe it is because we warmed up the slaw mix before hand, the original recipe did not call for us heating up the mixture or using soy sauce.


Wednesday, July 7, 2010

Little Chef: Vegetables

A couple great ways to keep little hands busy in the kitchen, when all they want to do is help.
Shuck the sweet corn
and snap the beans!

We have been visiting the farmers market atleast weekly this summer and are loving all the fresh, local farm foods! 

Little Chef: Meatloaf

Easy Meatloaf
1 1/2 lb. ground beef                       salt and pepper
1 egg                                              2 T. brown sugar
1 onion, chopped                            2 T. prepared mustard
1 cup milk                                       1/3 cup ketchup
1 cup breadcrumbs
Preheat oven 350 degrees.
Combine; beef, egg, onion, milk & breadcrumbs.  Season with salt and pepper.  Place in loaf pan.
In seperate bowl, combine brown sugar, mustard, ketchup.  Mix well and pour over meatloaf.
Bake for 1 hour.

Before Noah came to the kitchen I had all the ingredients measured out in the cups.  Noah poured in all the ingredients.  I handled the raw meat and Noah held onto the spoon as we stirred.  He was great help and loves to be cooking with David and me.
Another great thing about Noah helping make dinner is he also ate dinner.  Noah is not a big meat eater but after we complimented him on his meatloaf and talked about everything we put in to make it he had no hesitation, he dug right in!

Tuesday, July 6, 2010

Kitchen Message Boards

There is not much open wall space in our kitchen but I needed a place to charge my phone, put up a marker board for grocery lists, and I also made this cute menu board.  There is about 3-4 feet of wall space between where the fridge door opens up and the back door open up, prime realestate!  I had all the materials so it was a very inexpensive project.  The decorative shelf was used in our old apartment in the dining room but I am using it in the kitchen here. I had the marker board from college and painted the frame black and the menu board is a picture frame. For the menu board: I measured some scrapbook paper, used my cricut to cut circles, used some sticker letters for the days of the week and header put it all back in the frame and use a dry erase marker on the glass.  David even thought it looked good (and he usually doesn't get into the crafty things).  So here's to being a little more efficient in the kitchen!  Does anyone want Pizza on Friday :-)

Saturday, July 3, 2010

All Your Baby's Needs

Recently several of our very close friends are expecting their first child and have asked those of us who already have kids, (here are some of the kids, this picture was taken in 08, the number of kids have doubled since then!)

"okay, so what do we really need to register/buy to survive?  What was useful and what could you just live without?"
So I am writing all our responses and putting out there for anyone else who might want some ideas or opinions (not like you don't get enough people telling you what to do when you become a parent, HA!)

Newborn:
Bottle Warmer
Diaper Genie
Diaper Genie Refills
Crib/Mattress
Dresser (if you make sure and purchase a dresser that is atleast 34 inches in height it can double as a changing table - that was a total space saver for us since we lived in an apartment)
Changing Table/Changing Pad
Boppy Pillow (even if you don't nurse they are great, soft pillows to prop baby up and you don't have to worry about them rolling over)
Onsies
Sleepers (Noah pretty much lived in onsies and sleepers atleast for the first couple months)
Socks
Swing (this is something that can easily be found at a garage sale in fairly good shape)
Bouncy Seat  (this is something that can easily be found at a garage sale in fairly good shape)
Large Receiving Blankets for swaddling (one friend had a specific: Miracle Blanket)
Sound Spa (preferred by some for white noise, we personally used a small table top fan)
Baby Monitor
Dishwasher Baskets (for all those little bottle parts, if you have a dishwasher)
Bottle Drying Rack
6 Bottles (atleast)
Burp Clothes (old fashioned cloth diapers are very absorbant and pretty inexpensive and you can always dress them up by sewing on a ribbon)
Crib Sheets (atleast 3-4)
Bassinet (this was not something that we registered for, mainly because we lived in a small apartment and Noah slept in his crib from day one.  Many prefer one though for placing next to your bed for those middle of the night feedings)
Pack-n-Play (not a necessity right away but you will travel OR you can set this up in our room instead of a bassinet and really if people are going to buy you those bigger items then you having to do it later than you better add it to the list)

Pack-n-Play sheets (I have survived with one)
Baby Bathtub
Diapers (All sizes)
Wipes
Diaper Bag (I preferred one with an insulted pocket, but they are a little hard to come by and expect to by another one or two along the way, we are pretty hard on our diaper bags)
Bottle Brush
Stroller (Many prefer a system, we personally registered for the safety first that reclined and would put a positioner in the stroller so Noah wouldn't roll back and forth-again a space issue for us-but we have used the same stroller and Noah is now 2 1/2)
Nursing Cover Up (there are tons out there, you can even make your own)
Baby Wrap/Sling/Carrier (here is a really easy and inexpensive one that I have found to make check it out: Baby Wrap)
Formula Dispenser (if you aren't nursing and it is great for those middle of the night feedings before you go to bed measure out the correct amount and fill your bottles of water and all you have to do is warm the water and pour the formula when you are half asleep)
Travel Changing Pad (usually one comes with the diaper bag, but you better make sure)
Formula (if that is the route you are going)
Sun Shade (for the car)
Car Seat and Base

For Later On:
Highchair (one that can recline a bit and baby can join you and the family at the dinner table)
Travel Booster
Snack Traps (I have had the best luck with the Munchkin Snack Catcher)
Sippy Cups w/ handles and soft tips
Rubber Tipped Spoons
Safety 1st Training Potty (seems to be the most preferred among our group of friends)
Small bowls with lids
Bibs (I have some good friends that make some check them out: The Dotted Duck)
Bumbo Seat (these are also nice to sit in the bathtub, once baby gets control of their head, since it is rubber.  But please never leave your little one unattended)

Check back for any updates in case I missed something or please share what worked and didn't work for you.  Every child and family is different.

Wednesday, June 30, 2010

Jewlery Box

So this is what I started off with.  I had purchased this memory shadow box from Ross' for about $7!  I really couldn't pass it up even though I don't have a little girl, and it wasn't for me oringinally.  I bought it to remake for our son. (no, there was not a little boy themed shadow box otherwise I would have bought it) So I have held onto this for 3 months and last week I decided to redo it for myself after all and this is what I cam up with.
As you can see I made it to hang/display my jewlery, and I love how it turned out.

 
The vase is from our bedroom, so I kind of used that to match colors.  I used some paint that I already had, so no cost there!


Added some clear command hooks to hang my necklaces.  I attached ribbon with brads and adhesive to hang my earrings.  Lukily for me a majority of my earrings are hook earrings, so they just loop over the top of the ribbon.  And because it is a shadow box the pins and earrings that are not loop backs rest in the bottom.  I already use a dish for all my bracelets, so that is staying.

And there it is hanging above my dresser.  I am going back and forth about the colors it might be a bit too 'primary' in color for me.  But I really want to work on those 'pops' of color....I might repaint the outside frame a basic black or rich brown and then leave the insides green and the paper......I don't know I will see what I think in a week.  Anyway, I am really excited about how it turned out.  Thanks for checking it out.  I am still working on the rest of the room.  Do you know how hard it is to find a basic bedskirt that isn't spendy!!  I think I might end up making my own, ugh!


Linked Up With:

Tuesday, June 22, 2010

Master Bedroom

I know this looks pretty sad master but every parent out there know that when you have kids you come last, plus the whole moving in thing happening less than a month ago.  I have been pretty presistant about putting our bedroom together and excited about it.  Our home does not have very large bedrooms but we aren't the type that hangs out in our bedroom either.  But that doesn't mean it can't look good.  So begins my to-do list:

1) Paint walls:  I decided on Martha Stewarts Chocolate Truffle (doesn't it sound yummy?)  As you can see on the walls there are several different patches of paint colors and I have already started to go around the windows, baseboards ect. so I can just start rolling it on.

2) Figure out what to do with those two sconces.  We like them but they do not make sense, they are off centered!  Any ideas!?!

*The pops of color are coming from the colors in the quilt on our bed.  The quilt was made by David's mom as our wedding gift.  She is an awesome quilter and all of our beds are covered up with her quilts - we love them.  So any way accessories and pillows will be in blues and greens.

3) Sew curtains: I have a, what I think will be a great idea, I purchased sheer chocolate brown panels and  blue sheer/textured panels (don't you love my technical terms)  I plan on layering them on the two windows - hopefully that will add somthing.

4) Shelving (more of the decorative type)....still looking for inspiration for that.

5) Some sort of bedshirt.

6) The last picture is of the closet door that whole wall is a reach in closet but it only has this single door into it, and it is dark in there.  It will be some time but we are hoping to open that up with some double doors, and add some shelving and a light.

7) The desser and bedside table were my husbands growing up and are in great shape so I (we) are not ones to get rid of perfectly good furniture but I might put some new hardware on them...

8) Find/purchase a bedside table of myself.

9) Headboard needed.

10) Lastly accessorize:  I have that vase sitting on top of the dresser, some framed pictures, pillows, lamps (if I can't figure out the sconces)....

So there you have it what I will be working on for awhile, I will keep you posted.  Any ideas are welcome.


Friday, June 18, 2010

Need A Packed Lunch For the Little One....

Every morning we go through the same thing, what are we packing for lunches. Luckily my husband is usually on the lunch line and gets Noah and I out the door but we still feel like he is always eating mac n' cheese or hot dogs....he doesn't seem to mind but we still want to expose him to different foods and eat a well rounded meal. Here are some ideas for those of you that go through the same thing day after day.

1. Not just PB&J but try other toppings between two pieces of bread:
~ lunch meat and cheese
~ cream cheese (we use a vegetable & chive sometimes)
~ nutella (maybe more of a snack choice)
~ finely chopped BBQ chicken or pork (I say finely because our little guy really does not like the texture of shredded meat)
~ tomato sauce, pepperoni
~ peanut butter, honey, banana
Try some different grain choices:
~ pita
~ tortilla
~ biscuits
~ bagel
~ waffle

2. Pasta. Noodles are always a hit with out little guy.
~ macaroni and cheese
~ butter and grated parmasen
~ spaghetti sauce
~ mixed with veggies: peas, carrots (with a little butter)
~ teriyaki with mixed veggies
~ ravioli: stuffed with cheese, meat, vegetables
Not just Elbows: (Have fun with noodles there are so many to try)
~ rotini
~ elbow
~ shells
~ ramen
~ the wagonwheel shapes
~ spaghetti
~ sometimes you can find special shapes: hearts, animals, letters (I have seen them at World Market)

3. Chicken Nuggets

4. Mini Pizza

5. Quesadilla:
~ refried beans
~ cheese
~ shredded meat
~ spinach
~ mushrooms
~ peppers, onions

6. Sides:
~ applesauce
~ fresh fruit: apples, oranges, pears, peaches, bananas, mango, cherries, blueberries, raspberries, melon, grapes, the possibilities are endless
~ raw veggies: carrots, broccoli, cauliflower, avocado, peppers
~ cooked veggies: carrots, broccoli, califlower, peas, grean beans, edamama, squash, sweet corn
~ crackers or breadsticks
~ cubed cheese/string cheese
~ graham crackers

6. Add a Dip:
~ ranch
~ guacamole
~ hummas
~ cream cheese
~ salsa
~ a mexican layer dip

Share your ideas, and I will add more as I think about it. We also try our best to pack lunches in containers that can be reused. Noah sports a lunch box from LapTop Lunches http://www.laptoplunches.com/ , it is a bit spendy at first but we use it. The Container Store http://www.containerstore.com/shop/kitchen/foodontheGo also offers several lunch container options.

Curio Re-Do

I adopted this fun curio cabinet, it used to be my grandparents.  It was a deep red with a black brushed over the top.  I purchased Rustoleum Satin Black spray paint and went to town.  I had to remove the broken glass and sand some edges.  I also decided to leave the insides/shelving red.

Here's the finished product, I am very happy with it.  All I need to do is get a piece of glass cut and it will be a project completed!  (I couldn't wait for the glass to move it into our house)